DIY Common Plumbing Fixes Every Homeowner Needs to Know
Plumbing issues are bound to happen. Whether it’s a leaky faucet, a clogged toilet, or a sink that won’t drain—these are the kinds of issues that can disrupt your routine at the worst times. But there’s good news: Many of these problems are simple to fix yourself.
You don’t have to be a pro to do basic plumbing maintenance. Some of the most common plumbing hiccups can be solved in under an hour. So, without further ado, let’s dive into some of the essential DIY plumbing fixes every homeowner should know.
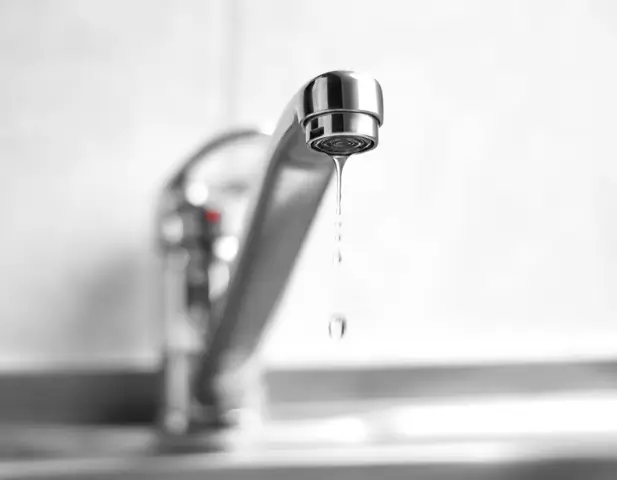
Stop a Dripping Faucet Fast
A steady drip from your faucet can be irritating. It’s also a waste of water and money. But the cause is usually simple—a worn-out washer or cartridge inside the faucet. Doing a quick repair usually doesn’t take too long.
The first thing to do is shut off the water under the sink. Use a screwdriver—a Phillips or flathead—and remove the faucet handle. Then, with a wrench, loosen the packing nut and remove the old washer or cartridge. Replace it with a new one that matches your faucet type. Afterwards, reassemble the parts and turn the water back on to confirm that it’s working correctly.
This 30-minute task could save you up to hundreds of gallons of water per year.
Unclog a Toilet Without Calling a Plumber
Clogged toilets are also a common nuisance. However, they are usually pretty easy to fix on your own. Start with a plunger. Be sure there’s enough water in the bowl to saturate the plunger cup. Then, press down firmly to create a seal and push and pull with force. Most clogs break up with this method.
If that doesn’t do the trick, try adding a few drops of dish soap to the bowl, followed by a bucket of hot (not boiling) water. Let it sit for 10 to 15 minutes. This could loosen the clog. Still stuck? Try a toilet auger or plumbing snake. Insert it into the bowl, twist, and pull it back to dislodge the blockage.
By using the right technique, you’ll be able to handle most toilet clogs on your own.
Fix a Running Toilet and Stop Wasting Water
Another common issue with toilets is that they keep running long after you flush. This is usually a problem inside the tank. The constant water flow, if not addressed, can waste dozens of gallons of water per day.
First, remove the tank lid and look at the flapper—the rubber piece that covers the flush valve. If it appears warped or doesn’t properly seal, replace it. You can find flappers to fit your toilet at virtually any hardware store and installing one only takes a few minutes.
If you find that the problem isn’t the flapper, check the fill valve. It might need adjusting or replacing. Most modern fill valves are easy to install and include instructions.
Clear a Slow or Clogged Drain
When your sink or shower starts draining slowly, it’s usually a sign of a clog in the drain line. Whether it’s hair, soap scum, or grime that’s built up over time—you don’t necessarily need to use chemicals to solve it.
Start by removing any visible debris with a zip-it tool or long tweezers. Next, pour half a cup of baking soda down the drain, followed by a full cup of vinegar. Let the mixture fizz and sit for 15 to 20 minutes before flushing it with hot water.
For especially stubborn clogs, consider using a small drain snake. Insert it into the drain, twist it to snag the blockage, and pull it out. Regular drain cleaning is one of the easiest plumbing repairs you can do that prevents bigger problems down the road.
If all else fails, it’s okay to use certain drain chemicals. See our full blog on best practices.
Repair Leaky Pipe Joints Under the Sink
Leaking pipes under the kitchen or bathroom sink are not always easy to detect. They’re also usually caused by loose connections or worn-out seals. If these go unchecked for an extended amount of time, what started as a slow leak can damage cabinets and flooring.
To fix these leaks yourself, start by turning off the water supply. Place a bucket underneath the joint to catch any water, then use a wrench to disconnect the fitting. Look closely at the threads for any damage and wrap them with plumber’s tape—also known as Teflon tape—to create a tighter seal.
.webp)
Screw the connection back in place and turn the water on—slowly. If it’s still leaking, the fitting may need to be replaced entirely. Either way, it’s a job most homeowners can tackle on their own in under an hour.
Replace a Showerhead for Better Pressure and Less Dripping
If your showerhead leaks or has poor water pressure, you can often fix the issue without having to call in a plumber. Replacing a showerhead is a simple upgrade.
Begin by unscrewing the old head. Clean the threads (they’re often grimy or rusted), then wrap them with plumber’s tape. Screw on the new showerhead by hand and tighten with a wrench if needed. It’s that simple. If you live in an area with hard water, there are showerheads specially designed to soften the water, too.
This quick fix not only improves your shower experience but also helps conserve water if you choose a low-flow model.
Know When to Call the Pros
While many basic plumbing repairs are manageable on your own—as mentioned above—there will be times when calling a professional will be the best option. If you notice a burst pipe, water damage behind walls, or a sewer backup, it’s time to call someone who is licensed to solve the issue.
Some jobs require professional tools and experience, especially when it comes to gas lines or main water service. With an America’s Preferred Home Warranty, we let you choose your own contractor for all covered repairs—so you have someone you know and trust entering your home.
The Value of Learning DIY Plumbing
When you understand how your plumbing system works, DIY plumbing projects become less of a stressor. A few tools and a little know-how really do go a long way. From a dripping faucet to a clogged drain, most common issues are well within your ability to address.
So, next time you hear a leak or see a slow drain, grab a wrench and solve the issue on your own. You’ve got this!